Turn a written spec into Figma frames with an AI agent
This tutorial shows how to let Claude Code or Codex build a screen in Figma from a written spec. You describe the sections, fields, buttons and copy in plain words. The agent builds one screen frame with auto layout, one frame per section and layers named after your spec, in the file you have open in the Figma desktop app on your Mac.
What you will do
You will copy one skill, open the FigmaMCP plugin in your file and give the agent a spec. The agent plans a layer tree, builds it, exports a picture to check the result and reports the tree. Use it for a first draft of a screen from a product spec or a PRD section, which a designer then refines.
Steps
Set up FigmaMCP
Install the FigmaMCP Mac app and connect Claude Code or Codex. If you have not done this yet, follow the tutorial Edit a Figma file with Claude Code in 5 minutes first.
Setup is the same for every task. See Edit a Figma file with Claude Code in 5 minutes or Figma MCP setup for Mac.
Copy the figma-spec-to-frames skill
Copy the
skills/figma-spec-to-framesfolder from the FigmaMCP releases page into~/.claude/skills/for Claude Code, or~/.codex/skills/for Codex. Then start a new agent session.A skill is a short instruction file that tells the agent which tools to call, in which order. The FigmaMCP app installs only the base
figmamcpskill, so you copy this one yourself. Get it from skills/figma-spec-to-frames.Open the plugin and check the switch
Open the file in the Figma desktop app, then choose Plugins, Development, FigmaMCP. Make sure the AI can edit this file switch is on. If it is off, every write is refused with
READ_ONLY_MODEand the agent stops.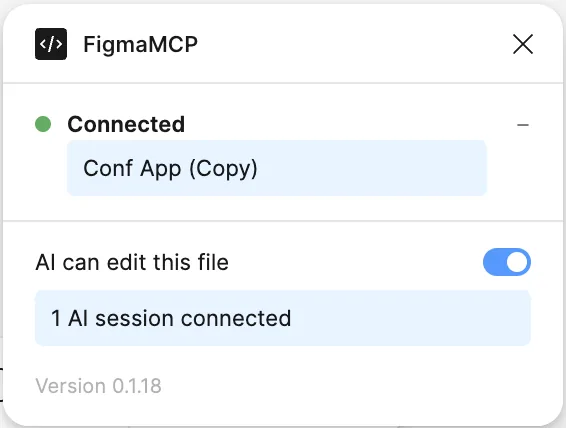
The FigmaMCP panel in Figma. With the switch off, the agent can only read. Write the spec and say where the screen goes
List the screen’s sections, fields, buttons and copy in plain words. Name the page or frame the screen goes on, and give its width, for example 375 for a phone or 1440 for desktop.
If you leave out the place, the agent asks. If you leave out the width, it asks or uses 375 and says so.
Let the agent plan the layer tree
Before it writes, the agent turns the spec into a tree: one screen frame, one frame per section, such as header, form and actions, and the text, fields and buttons inside each. It names each layer with the spec’s own words, such as Email field, not Frame 12.
For a long or vague spec, the agent shows you the tree first, so you can correct it before anything is built.
Let it build the frames
The agent creates the screen frame with vertical auto layout, to the right of the frames already on the page, so nothing overlaps. Each section fills the width of the screen and hugs its content. Each field or button is a small auto-layout frame with its label inside.
If the file has local styles or variables that match the spec, the agent links them instead of typing a literal color. The settings it uses, such as direction, spacing and padding, are the ones on Figma MCP auto layout.
Check the picture and the tree
The agent exports the screen as a PNG with
node_export_visualand looks at it. It fixes spacing or order, then shows the screen in Figma. It reports the layer tree and anything in the spec it could not build.Check the screen in Figma as you would check a colleague’s first draft. It is a wireframe-level start for a designer to style, not a finished visual design.
The skill’s worked example
The skill includes this example. It shows the prompt, the calls the agent is expected to make and the tree it is expected to report. It is an example written in the skill, not a recorded run.
Prompt: “In Figma, on Page 1, build a 375-wide Login screen from this spec: title Welcome back; subtitle Sign in to continue; an Email field and a Password field, each a 48px-high outlined box with the label as placeholder text; a full-width blue Sign in button; a Forgot password? link under it. Use auto layout everywhere.”
| Frame | Layout | Inside it |
|---|---|---|
| Login | Vertical, spacing 24, padding 24, hug height, white fill | Header, Form, Actions |
| Header | Vertical, spacing 8, fills the width | Title (24, bold), Subtitle (14) |
| Form | Vertical, spacing 12, fills the width | Email field, Password field: 48 high, gray stroke, corner radius 8 |
| Actions | Vertical, spacing 12, centered | Sign in button (blue, 48 high), Forgot password? (blue, 14) |
The tree the agent is expected to report:
Login (VERTICAL, 375 wide)
├─ Header: Title, Subtitle
├─ Form: Email field, Password field
└─ Actions: Sign in button, Forgot password?
What the agent will not do
- It does not delete or move existing layers. It only adds the new screen.
- It does not invent copy, images or icons that the spec does not state. A missing image becomes a gray frame named Image placeholder.
- It does not create components or variants. Ask for that as a separate step; see Figma MCP components.
- It does not edit inside component instances or locked layers. The plugin refuses those writes.
Notes
- macOS only for now, and the Figma desktop app is required.
- To build a screen from code that already exists, see code to design.
- FigmaMCP is not affiliated with or endorsed by Figma, Inc.
Next: rename Figma layers with an AI agent, run a design QA pass on the new screen, all tutorials, or all tools.
Last updated:
